


How to Install Tape-in Extensions On Your Natural Hair
Looking for the best way to add some length, volume, and fierce vibes to your natural hair?
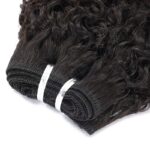
Tape-in extensions are a bomb way to get that salon-worthy look without the commitment (time or price tag) of sew-ins.
But before you dive headfirst, let's let you in on some tips about the Tape-in installation process. Grab your notes, sis!
- Prep is key: This is the most important step in installing tape-in extensions. Wash your hair first with a clarifying shampoo like Bond Breaker to remove any product or dirt buildup that might mess with the tape's grip. Don't forget to clean your tools too!
- Section neatly: Part your hair in neat sections, starting from the bottom and working your way up. This makes application easier and keeps your hair organized.
- Double the tape, double the slay: Use two tape sandwiches per section for maximum hold. Trust me, your extensions will thank you later.
- Heat seals the deal: After applying the tape, use a flat iron on low heat to activate the adhesive and create a super strong bond. Be gentle, though, you don't want to melt anything!
Ready to Start Taping?
Gather Your Tools; High-quality tape-in extensions (matched to your hair texture), Bond remover shampoo (cleans hair for better grip), Alcohol wipes (disinfects tools), Flat iron (seals the tape), Sectioning clips, Comb
Step 1: Prep Like a Pro:
- Wash your hair with the bond remover shampoo. This removes build-up for maximum tape adhesion.
- Divide your hair into neat sections for easier application.
- Apply a thin layer of bond remover to your natural hair where the tape will be placed.

Step 2: Tape It Up:
- Place a weft with the tape facing down on a comb. Lift a section of hair and place the comb underneath.
- Gently press the weft against your hair, then roll the comb off, creating a "sandwich" with your natural hair in between the tapes.
- Apply another weft with the tape facing up, aligning it with the bottom weft. Press firmly to seal the bond.
(Optional): Use a flat iron on low heat to activate the tape for extra hold.

Step 3: Repeat till Completion:
Continue sectioning and applying tape-ins until you achieve your desired length and volume.
Pro Tips for Long-Lasting Tape-In Extensions:
- Sleep in a satin scarf or loose braid to prevent tangles and matting.
- Avoid tight hairstyles that put a strain on the tape bonds.
- Use sulfate-free shampoo and conditioner to preserve the tape's adhesive properties.
- Gently brush your hair, starting from the ends and working your way up to avoid pulling.
- Schedule regular maintenance appointments (every 4-6 weeks) for adjustments and re-taping.
Why Tape-In Extensions?
- Budget-friendly: Tape-in extensions are way more affordable than traditional methods.
- Beginner-friendly: No braiding or weaving skills needed! This method is perfect even for extension newbies.
- Versatile: Want a sleek bob or natural waves? You can style tape-ins like your natural hair, giving you limitless styling options.
- Protective: If installed correctly, tape-in extensions won't damage your natural hair strands. Plus, they're easy to remove when you're ready for a change.
Bonus: Where to Find the Best Tape-In Extensions:
Check out our tape-in collection to SHOP for top-notch tape-ins designed for Natural Afro-textured hair.